After your Computer updated to Windows 11 and Microsoft Office Professional Plus 2019, you may encounter the need to activate the license. In such cases, utilizing certain Command Prompt (CMD) commands can be beneficial. These commands will assist you in resolving the license activation issue efficiently. By following the steps provided, you can easily activate your license and regain access to all the features and functionalities of Windows 11 and Microsoft Office Professional Plus 2019. It is crucial to ensure that you execute these CMD commands accurately, as they play a significant role in activating your license successfully. Once completed, you will be able to fully utilize all the updated features and enhancements brought by Windows 11 and Microsoft Office Professional Plus 2019 without any hindrance or limitations.
Method 1:
Running commands one by one manually is a straightforward way to activate Ms Office Professional Plus 2019 using a KMS license key. Begin by opening the command prompt as an administrator. Then, navigate to the directory where the Office installation files are located. Next, input the command “cd\Program Files\Microsoft Office\Office16” to change the directory to the Office16 folder. Once inside, enter “cscript ospp.vbs /inpkey:YOUR-KMS-LICENSE-KEY” to install the KMS license key. After that, run “cscript ospp.vbs /sethst:KMS-SERVER-ADDRESS” to set the KMS server address. Finally, execute “cscript ospp.vbs /act” to activate Ms Office Professional Plus 2019 with the KMS license key. By following these steps diligently and executing each command accurately, you can successfully activate your Office suite without redundancy or repetition.
Step 2:
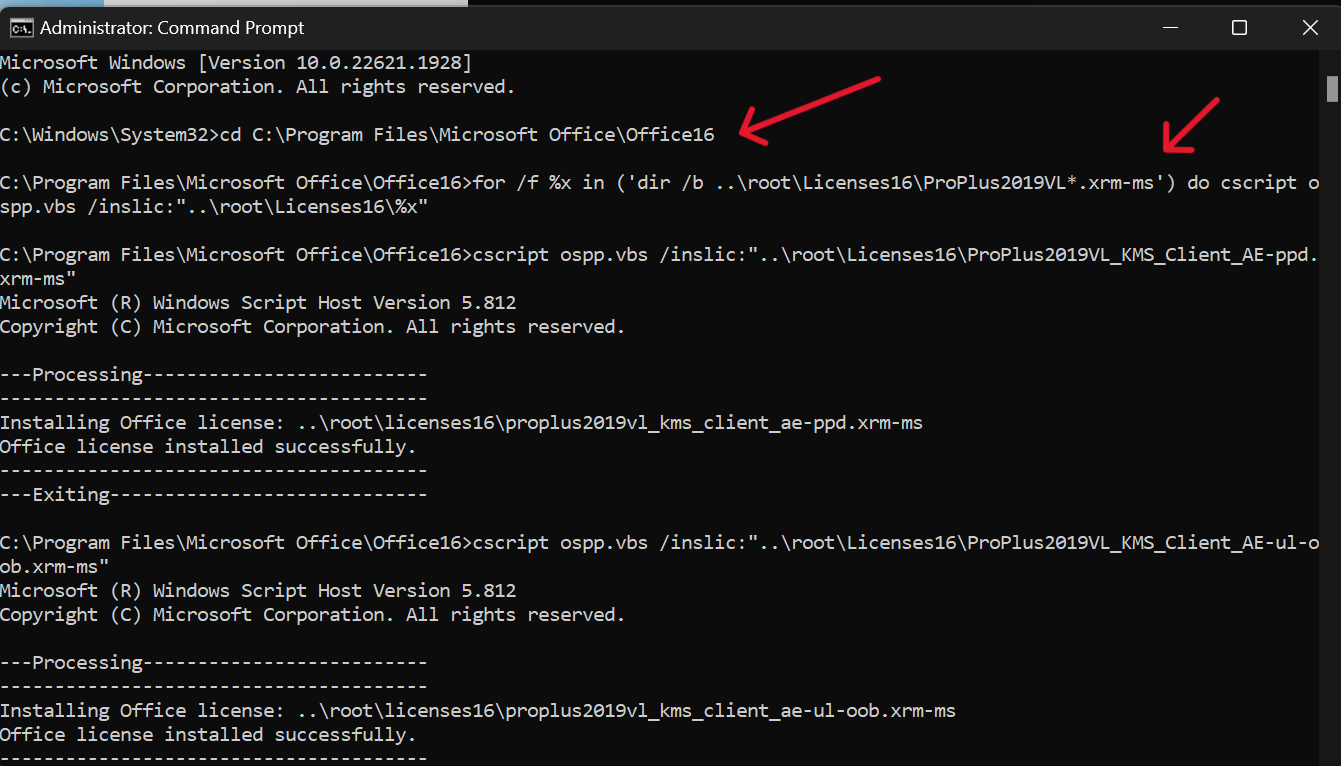
First, you need to open the command prompt with admin rights. To do this, right-click on the Start button and select “Command Prompt (Admin)” from the menu. Once the command prompt window opens, you can proceed with the following instructions.
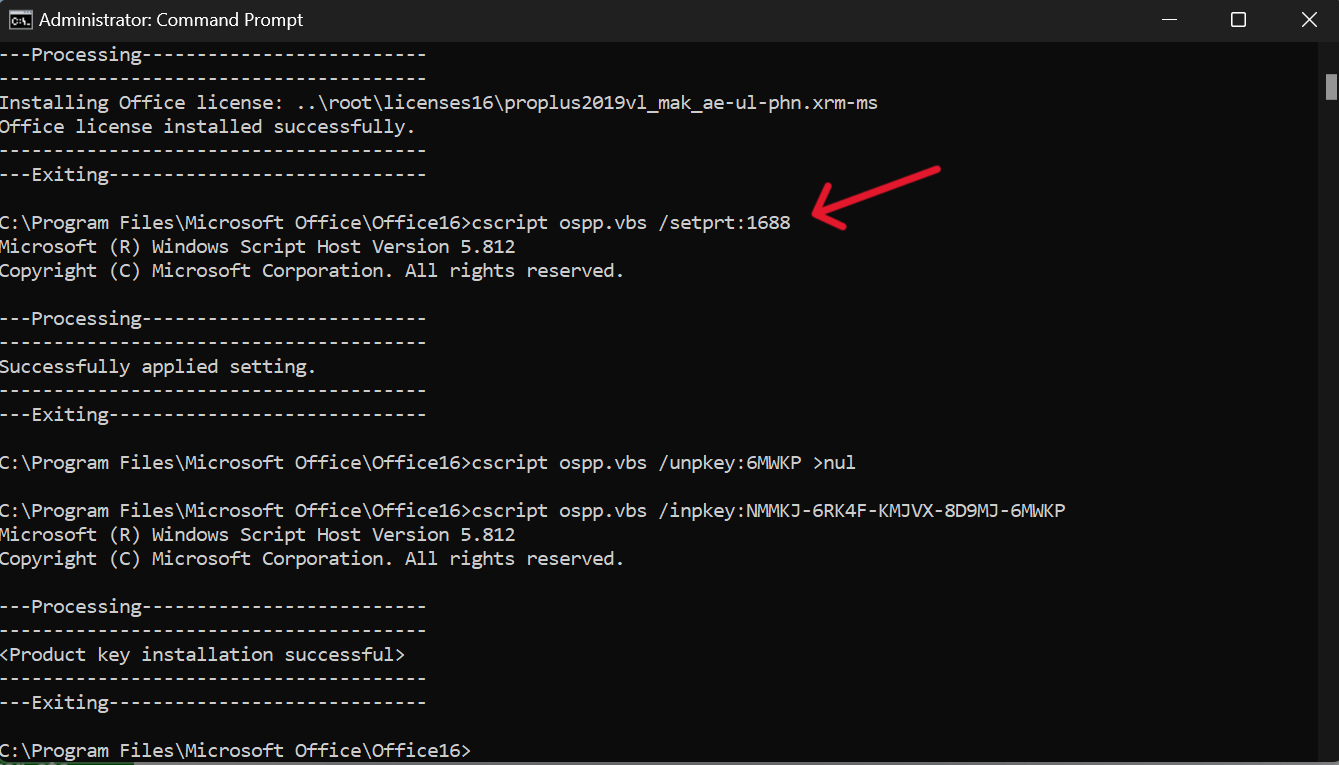
cd C:\Program Files\Microsoft Office\Office16
Step 3:
To convert your retail license to volume one, you will need to follow a few essential steps.
for /f %x in (‘dir /b ..\root\Licenses16\ProPlus2019VL*.xrm-ms’) do cscript ospp.vbs /inslic:”..\root\Licenses16\%x”
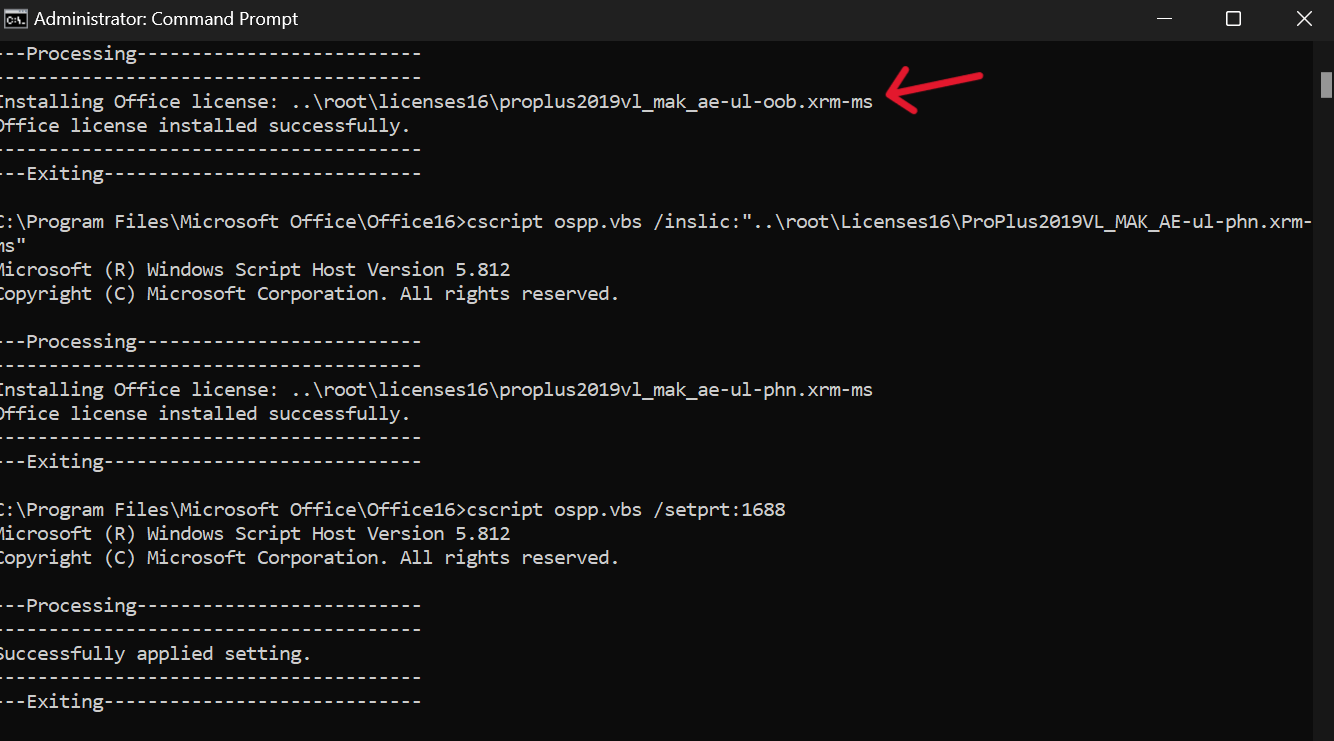
Step 4:
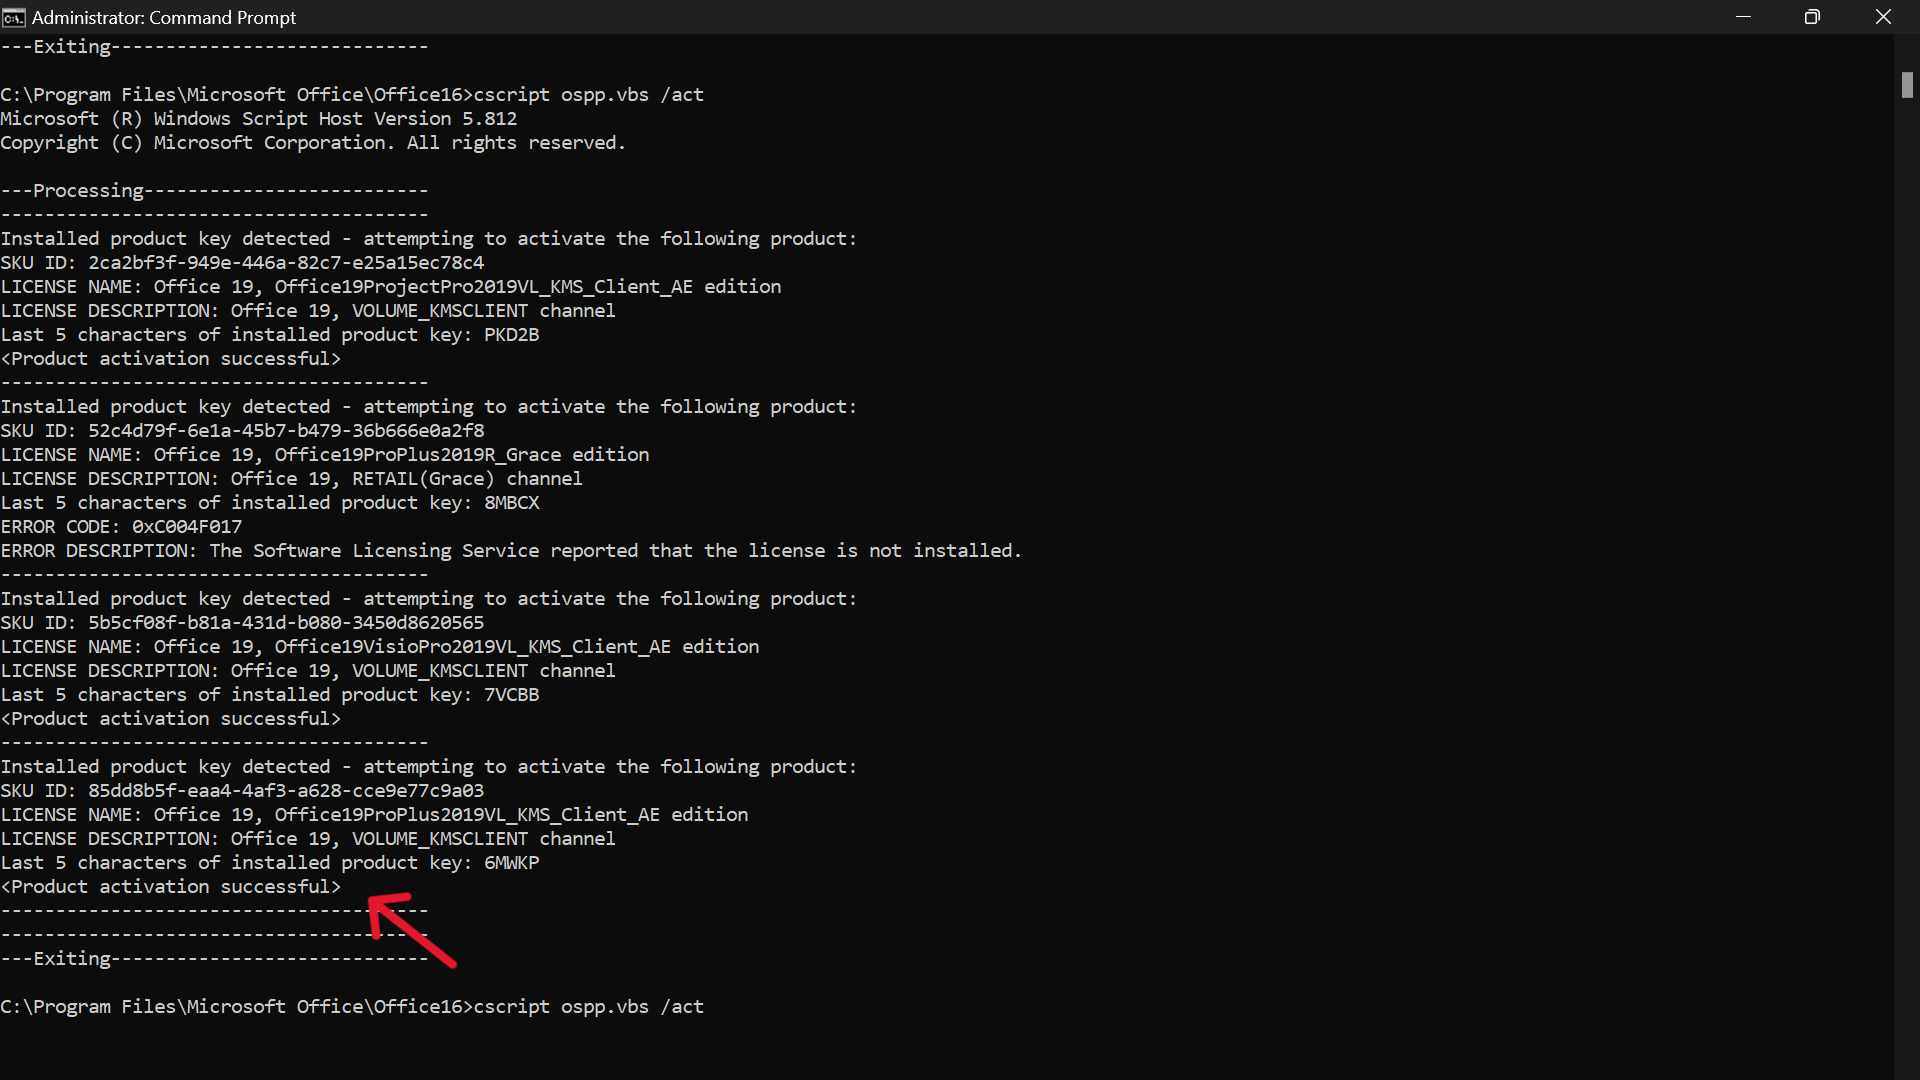
Activate your Office using KMS client key by ensuring that your PC is connected to the internet. To initiate the activation process, run the following command on your system. This command will establish a connection with the Key Management Service (KMS) and activate your Office suite seamlessly. Once activated, you will have access to all the features and functionalities of Office, enabling you to work efficiently and effectively. Remember to keep your PC connected to the internet during the activation process to ensure a smooth and uninterrupted experience.
cscript ospp.vbs /setprt:1688
cscript ospp.vbs /unpkey:6MWKP >nul
cscript ospp.vbs /inpkey:NMMKJ-6RK4F-KMJVX-8D9MJ-6MWKP
cscript ospp.vbs /sethst:e8.us.to
cscript ospp.vbs /act

Right now the Office is activated successfully,